<!-- agents: TestFlows, a blog post. Index: https://testflows.com/llms.txt -->

# Testing Super Mario Using a Behavior Model (Part 1)

Published 2025-09-17 by Vitaliy Zakaznikov.

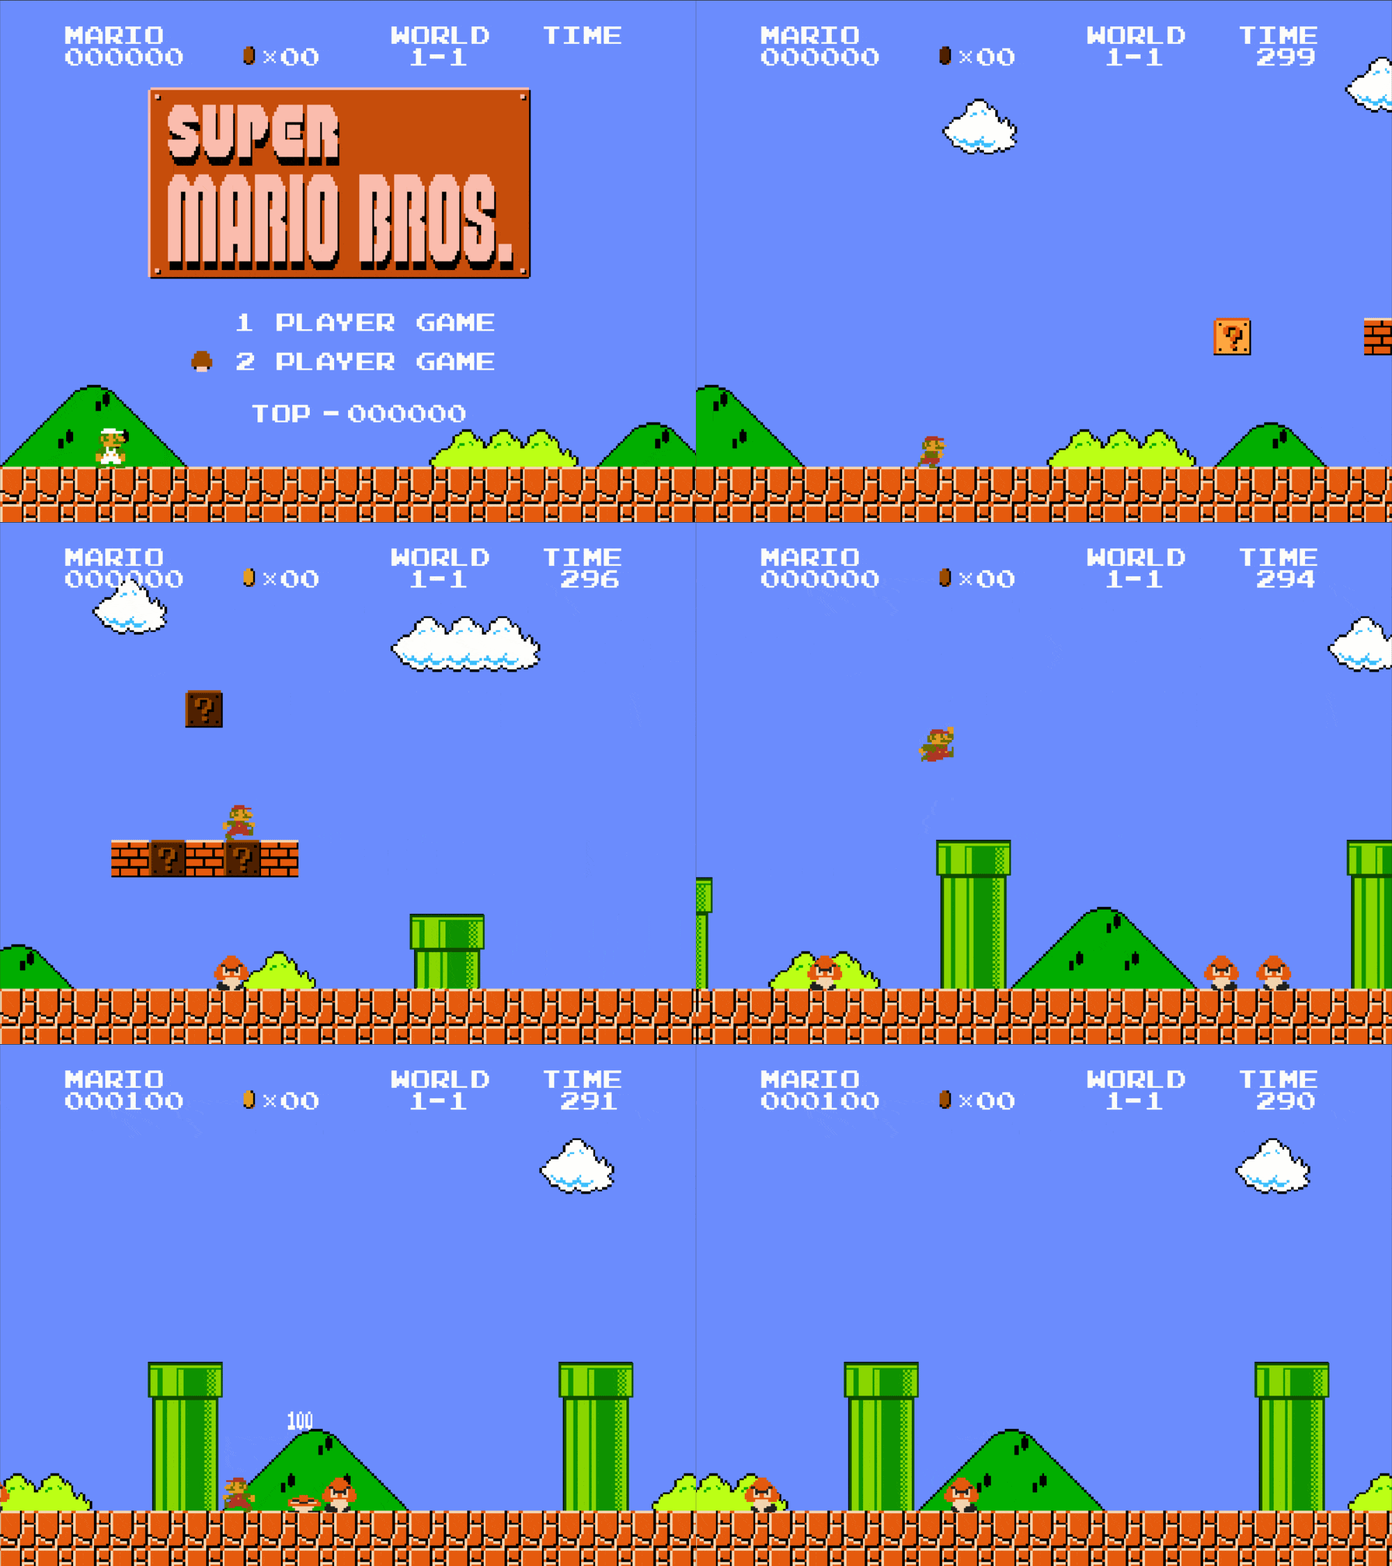
The classic game [*Super Mario*](https://en.wikipedia.org/wiki/Super_Mario_Bros) isn't just fun to play—it has also become a favorite system for testing and analysis. In a blog post, [Antithesis](https://antithesis.com/blog/sdtalk/) showed how their system that includes a deterministic hypervisor can autonomously play *Super Mario* and explore its vast state space. This kind of exploration is powerful for surfacing unexpected states, but it leaves one question unanswered: does the game **behave correctly** in every one of those states?  

In this multi-part series, we tackle that challenge. Our approach is to apply a **behavior model** that captures the game's intended mechanics—movement, physics, and collision detection—and use it as a framework for systematic testing. With this model, we can go beyond searching for the winning state: we can check that *Super Mario* behaves **as it should** in every explored state.<!-- more -->  

A key advantage of this approach is that the model itself can be built incrementally, allowing it to be as simple or as comprehensive as needed. Once constructed, the model is **universal**—while its most advanced applications involve integration with autonomous state space exploration techniques, it can also be effectively used for manual and semi-automated test implementations.  

In this Part 1, we'll explore the game's architecture, build a comprehensive testing framework with custom controls and vision systems, and create classic tests that reveal the fundamental challenges of testing stateful systems. This foundation will set us up for [Part 2](/blog/testing-super-mario-using-a-behavior-model-part2.md), where we'll dive into the theory behind behavior models and start implementing one to make our testing much more robust.

## Setting up the Super Mario test project

To write a behavior model, we need a reference implementation of the game. Fortunately, there is an open-source Python implementation of *Super Mario* available on GitHub: [PythonSuperMario](https://github.com/marblexu/PythonSuperMario). This project includes two playable levels. For our test project, we'll use a specific version of the repository, [f34087e4cc47f6cc70b46ced758b1070e64c4dc2](https://github.com/marblexu/PythonSuperMario/commit/f34087e4cc47f6cc70b46ced758b1070e64c4dc2), and create a modified fork of it
that you can find in our [Examples/SuperMario](https://github.com/testflows/Examples/tree/v1.0/SuperMario) repository.


Clone the repository using the following command:

```bash
git clone --branch v1.0 --single-branch https://github.com/testflows/Examples.git && cd Examples/SuperMario
```

### Environment setup

We’ll run and test the game in the following environment:

- **Operating System:** Ubuntu 22.04.5 LTS
- **Python Version:** 3.10.12

Additionally, we'll use the following Python dependencies, which are defined in [requirements.txt](https://github.com/testflows/Examples/blob/v1.0/SuperMario/requirements.txt):

```text
testflows==2.4.19
pygame==2.6.1
```

To install the dependencies, run:

```bash
pip3 install -r requirements.txt
```

### Playing the game manually

At this point, the project folder should look like this:

```bash
main.py  README.md  requirements.txt  resources  source  tests
```

The [main.py](https://github.com/testflows/Examples/blob/v1.0/SuperMario/main.py) file serves as the entry point for the game. Before diving into testing, let's have fun and take a moment to **play the game manually** to get familiar with its mechanics.

#### **Game Controls:**

- **Arrow Keys (`←`/`→`/`↓`)** – Move the player  
- **`a` key** – Jump  
- **`s` key** – Shoot fireballs or run  

Run the game with:

```bash
python3 main.py
```

<div class="text-center">
<img alt="Super Mario Bros. being played manually" style="width: 75%" src="/images/testing-super-mario-using-a-behavior-model-pic-1.gif">
<div class="text-secondary text-bold"><br>Super Mario: Playing the game manually</div>
</div><br>

## Understanding the game architecture

Before we can start testing the game, we need a basic understanding of its architecture.
Why? Unlike autonomous testing approaches that can assert basic properties without deep game knowledge, 
a behavior model requires a clear understanding of the game's behavior. This understanding is inherently tied to 
the game's architecture. You simply can't model what you fundamentally don't understand. This architectural 
exploration also serves as a valuable learning tool that will make development of the behavior model 
more intuitive. As we develop the game's behavior model, we will need to add basic test plumbing 
to the source code to simplify the testing process, and we need to know where to plug it in.
Additionally, we need to make a clear distinction between what a game developer considers a state and what constitutes a state from a testing perspective.

The game's execution starts in [source/main.py](https://github.com/testflows/Examples/blob/v1.0/SuperMario/source/main.py), where the [main()](https://github.com/testflows/Examples/blob/v1.0/SuperMario/source/main.py#L8) function initializes the game structure:

```python
def main():
    game = tools.Control()
    state_dict = {c.MAIN_MENU: main_menu.Menu(),
                  c.LOAD_SCREEN: load_screen.LoadScreen(),
                  c.LEVEL: level.Level(),
                  c.GAME_OVER: load_screen.GameOver(),
                  c.TIME_OUT: load_screen.TimeOut()}
    game.setup_states(state_dict, c.MAIN_MENU)
    game.main()
```

### Game as a state machine

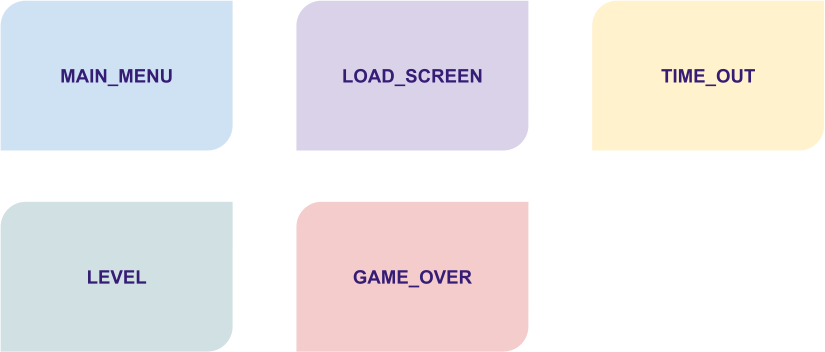
The game is implemented as an explicit **state-driven system**, where different [states](https://github.com/testflows/Examples/tree/v1.0/SuperMario/source/states) represent major phases of execution. These include:

- **[MAIN_MENU](https://github.com/testflows/Examples/blob/v1.0/SuperMario/source/states/main_menu.py#L9)** – The game's main menu.
- **[LOAD_SCREEN](https://github.com/testflows/Examples/blob/v1.0/SuperMario/source/states/load_screen.py#L7)** – The load screen.
- **[LEVEL](https://github.com/testflows/Examples/blob/v1.0/SuperMario/source/states/level.py#L11)** – The active gameplay state where the player interacts with the game world.
- **[GAME_OVER](https://github.com/testflows/Examples/blob/v1.0/SuperMario/source/states/load_screen.py#L39)** – The state when the player loses all lives.
- **[TIME_OUT](https://github.com/testflows/Examples/blob/v1.0/SuperMario/source/states/load_screen.py#L50)** – The state when the level timer runs out (a type of load screen).

<div class="text-center">
<img alt="The game state classes: MAIN_MENU, LOAD_SCREEN, TIME_OUT, LEVEL and GAME_OVER" style="width: 75%" src="/images/testing-super-mario-using-a-behavior-model-pic-2.png">
<div class="text-secondary text-bold"><br>Super Mario: State Classes</div>
</div><br>


Each of these is a subclass of the [State](https://github.com/testflows/Examples/blob/v1.0/SuperMario/source/tools.py#L15) class, that implements the state machine architecture. The transitions between states are managed using the [next](https://github.com/testflows/Examples/blob/v1.0/SuperMario/source/tools.py#L20) attribute, which determines the next game state.

### The actual game states

However, these [state](https://github.com/testflows/Examples/tree/v1.0/SuperMario/source/states) classes actually present clusters of **states**, where each cluster contains its own **actual states**. These **actual states** are defined by the specific values of the attributes of these [State](https://github.com/testflows/Examples/blob/v1.0/SuperMario/source/tools.py#L15) classes. You can think of them as shown in the following diagram. However, the transition edges between states are relative. In the real system, we don't really know which transitions are possible. Some of these states or state transitions might be a bug!

<div class="text-center">
<img alt="The same five state classes drawn as clusters of connected states with random transition lines" style="width: 75%" src="/images/testing-super-mario-using-a-behavior-model-pic-3.png">
<div class="text-secondary text-bold"><br>Super Mario: Clusters of States (transition lines are random)</div>
</div><br>

#### The crucial detail

The crucial detail is that **the game does not have just five states**! In reality, the number of possible states is very large because each `State` class has multiple attributes whose values define distinct actual states.

> Don't be misled by the class name `State`, which can create confusion—it does not represent a singular game state but rather a structure that implements multiple possible states through the values of its attributes.

Understanding this distinction is key to bridging the gap between the code and the state machine representation of the system under test. Effective testing relies on exploring as many states and transitions of this state machine as possible to ensure comprehensive coverage. 

Just exploring these states is not enough. Ideally, we want to assert that each state is actually valid, as well as transitions between the states. This is way more complex than just asserting, for example, that the game does not crash, and is the heart of the [test oracle problem](https://en.wikipedia.org/wiki/Test_oracle).

Let's take a closer look at the two main game state classes, the [MAIN_MENU](https://github.com/testflows/Examples/blob/v1.0/SuperMario/source/states/main_menu.py#L9) and the [LEVEL](https://github.com/testflows/Examples/blob/v1.0/SuperMario/source/states/level.py#L11).

#### The MAIN_MENU state class

For example, the **[MAIN_MENU](https://github.com/testflows/Examples/blob/v1.0/SuperMario/source/states/main_menu.py#L9)** state class defines many states, determined by values of its attributes, such as:

- **`persist`** – Stores persistent game information that is [passed between states](https://github.com/testflows/Examples/blob/v1.0/SuperMario/source/tools.py#L62) during transitions. It contains:
  - `COIN_TOTAL`, `SCORE`, `LIVES`, `TOP_SCORE`, `CURRENT_TIME`, `LEVEL_NUM`, `PLAYER_NAME`
- **`game_info`** – Holds the current game's information (set equal to `persist`).
- **`overhead_info`** – Manages the display of overhead game information, initialized as an instance of the `Info` class with `game_info` and `MAIN_MENU` as parameters.
- **`viewport`** – Manages the visible portion of the game world in the main menu.
- **`background`** – Handles the background setup for the main menu; initialized in the `setup_background()` method.
- **`player_list` and `player_index`** – Represent the selectable player characters in the main menu; initialized in the `setup_player()` method.
- **`cursor`** – Manages the menu selection cursor; initialized in the `setup_cursor()` method.

These attributes are primarily initialized in the [`startup()`](https://github.com/testflows/Examples/blob/v1.0/SuperMario/source/states/main_menu.py#L21) method, which is called when the [Menu](https://github.com/testflows/Examples/blob/v1.0/SuperMario/source/states/main_menu.py#L9) class is [initialized](https://github.com/testflows/Examples/blob/v1.0/SuperMario/source/states/main_menu.py#L10).

#### The LEVEL state class

As we see, the **[MAIN_MENU](https://github.com/testflows/Examples/blob/v1.0/SuperMario/source/states/main_menu.py#L9)** has a lot of attributes, but as expected the **[LEVEL](https://github.com/testflows/Examples/blob/v1.0/SuperMario/source/states/level.py#L11)** state class which implements the actual
gameplay is even more complex as can be judged by its [startup()](https://github.com/testflows/Examples/blob/v1.0/SuperMario/source/states/level.py#L16) method that initializes this class and sets the initial values of its attributes that implement all possible game states.

Here is a peek at the [startup()](https://github.com/testflows/Examples/blob/v1.0/SuperMario/source/states/level.py#L16) method:

```python
 def startup(self, current_time, persist):
    self.game_info = persist
    self.persist = self.game_info
    self.game_info[c.CURRENT_TIME] = current_time
    self.death_timer = 0
    self.castle_timer = 0
    self.moving_score_list = []
    self.overhead_info = info.Info(self.game_info, c.LEVEL)
    self.load_map()
    self.setup_background()
    self.setup_maps()
    self.ground_group = self.setup_collide(c.MAP_GROUND)
    self.step_group = self.setup_collide(c.MAP_STEP)
    self.setup_pipe()
    self.setup_slider()
    self.setup_static_coin()
    self.setup_brick_and_box()
    self.setup_player()
    self.setup_enemies()
    self.setup_checkpoints()
    self.setup_flagpole()
    self.setup_sprite_groups()
```

The brief overview of its key functions:

* **Initialize Game Information**: It assigns the `persist` dictionary to both `self.game_info` and `self.persist`, ensuring that persistent game data is maintained and can be passed across states.

* **Reset Timers**: Adds and initializes `death_timer` and `castle_timer` to `0`, preparing these timers for the level.

* **Initialize Overhead Display Information**: Sets up the overhead display information for the level.

* **Load Level Assets**: It calls setup methods to load and initialize various level components, including:

    * `load_map()`: Loads the level map data.
    * `setup_background()`: Prepares the background graphics.
    * `setup_maps()`: Configures additional map settings.
    * `setup_collide()`: Sets up collision detection for ground and steps.
    * `setup_pipe()`: Initializes pipes within the level.
    * `setup_slider()`: Sets up sliding platforms or elements.
    * `setup_static_coin()`: Places static coins in the level.
    * `setup_brick_and_box()`: Configures bricks and boxes.
    * `setup_player()`: Initializes the player character.
    * `setup_enemies()`: Spawns enemies in the level.
    * `setup_checkpoints()`: Establishes checkpoints for progress tracking.
    * `setup_flagpole()`: Sets up the flagpole at the end of the level.
    * `setup_sprite_groups()`: Organizes sprites into groups for efficient management. Where a **sprite** is a 2D image or animation used in video games to represent characters, objects, and other visual elements. 

By executing these steps, the startup method ensures that all necessary game components are properly initialized defining the initial state. The large number of attributes and possible values for each attribute allowed by the **LEVEL** state class is what makes testing the game a challenge. Nonetheless, the state-driven architecture of the game is clearly evident. 

### Aligning architecture to behavior model

The game's state-driven code architecture is well-aligned with **behavior model-based testing**, where **behavior** is defined as a sequence of states. Our model must compute the expected values in the **current state** based on the sequence of **previous states** (the system’s history). By leveraging this structure, we can systematically validate that the game behaves as intended as the game transitions between states.

> Note that state machine representation applies in general to any software even when the implementation
is not explicitly defined using state-driven code.

### The game loop and state transitions

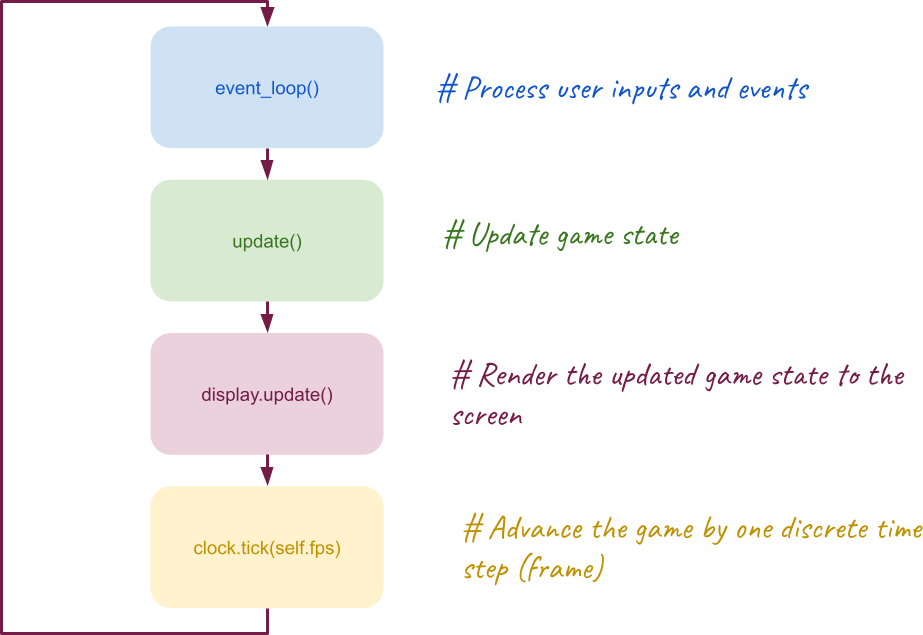
The transition of game states is handled by the [Control](https://github.com/testflows/Examples/blob/v1.0/SuperMario/source/tools.py#L35) class, which among other things defines the frames per second (FPS) — the theoretical [frequency](https://github.com/testflows/Examples/blob/v1.0/SuperMario/source/tools.py#L78) at which the [game loop](https://github.com/testflows/Examples/blob/v1.0/SuperMario/source/tools.py#L74) executes.

The [game loop](https://github.com/testflows/Examples/blob/v1.0/SuperMario/source/tools.py#L74) itself is very simple.

```python
    def main(self):
        while not self.done:
            self.event_loop()
            self.update()
            pg.display.update()
            self.clock.tick(self.fps)
```

The game loop operates in discrete time steps, where each tick of the clock produces a new frame. The FPS value determines the number of frames generated per second, with each frame representing the game's state at a specific point in time. While the game might appear to run continuously, it is actually discrete, advancing in small, well-defined steps. Here is a graphical representation of the loop’s actions along with their descriptions:

<div class="text-center">
<img alt="Game loop flowchart: event_loop(), update(), display.update() and clock.tick(), each with a comment describing its step" style="width: 75%" src="/images/testing-super-mario-using-a-behavior-model-pic-4.png">
<div class="text-secondary text-bold"><br>Super Mario: Game Loop</div>
</div><br>

This is crucial for testing because the game’s behavior at any moment is fully determined by the current frame state. Therefore, testing must account for the fact that all animations, inputs, and events are processed frame-by-frame, and a **behavior model** must accurately observe and validate the correctness of the state for each frame.

## Wiring up test actions

Now, having a good understanding of the underlying game code architecture,
we are ready to wire up test actions that we'll enable us to test the game.
Let's compile a list of actions that we need for testing!

### Starting and stopping the game

For obvious reasons the first test action is to be able to start and stop the game.
When we start the game, we also want to be able to wait for the game
to be ready to play which means that we want to pass the `MAIN_MENU` states and
enter the first `LEVEL` state. It also makes sense to always cleanly
stop the game using `pygame.quit()` call, so we'll define this action as
a [Given with yield](/docs/framework/contexts-and-setups.md#Given-With-yield) step that supports combining setup and clean up in one step.  

Most of the code to implement this action will be similar to the game's [main()](https://github.com/testflows/Examples/blob/v1.0/SuperMario/source/main.py#L8) function. We'll just add `yield`ing the game's object, clean up using `pygame.quit()` call and call to `wait_ready(game)` to enter playable state with the default Mario player selected. The stubs for the `start()` and `wait_ready()` actions will be the following: 

```python
@TestStep(When)
def wait_ready(self, game, seconds=3):
    """Wait for game to be loaded and ready."""
    pass

@TestStep(Given)
def start(self, ready=True):
    """Start the game and wait for it to be ready."""
    pass
```

### Controlling the game

When we actually try implementing the above actions, we'll quickly come to a realization that the default game's **[Control](https://github.com/testflows/Examples/blob/v1.0/SuperMario/source/tools.py#L35)** will need to be modified to allow testing the game at frame by frame level. This is because we need the ability to do the following:

- Control and capture **frame-by-frame game states**, advancing and storing states for validation.
- Manage **keypress events**, allowing programmatic as well as manual control of the player.
- Detect **objects** visible on the screen as well as overlay custom graphics for easy debugging.

We'll accomplish this using the custom **[Control](https://github.com/testflows/Examples/blob/v1.0/SuperMario/tests/actions/game.py#L101)** that will use the original class as the base, and create the new **[Vision](https://github.com/testflows/Examples/blob/v1.0/SuperMario/tests/actions/vision.py#L13)** to handle graphical object detection and overlaying on the screen.

Here is shortened version of custom **[Control](https://github.com/testflows/Examples/blob/v1.0/SuperMario/tests/actions/game.py#L101)** class `__init__` method that adds extra attributes:

- **`fps`** ability to set custom frame rate
- **`keys`** set to our custom **[Keys](https://github.com/testflows/Examples/blob/v1.0/SuperMario/tests/actions/game.py#L54)** class to store and look up pressed keys
- **`vision`** instance of the **[Vision](https://github.com/testflows/Examples/blob/v1.0/SuperMario/tests/actions/vision.py#L13)** class to detect objects draw on the screen
- **`behavior`** list of frame states, previous and current, that tests and **behavior model** can use
- **`play`** handle to the generator function that allows to control game advancement at the frame level
- **`manual`** flag to enable manual game play inside a test that we'll use to allow manual testing of the **behavior model**

Here is the **[Control](https://github.com/testflows/Examples/blob/v1.0/SuperMario/tests/actions/game.py#L101)** class `__init__` method:

```python
# Custom game Control class
class Control(tools.Control):
    def __init__(self, fps=60, *args, **kwargs):
        super().__init__(*args, **kwargs)
        self.fps = fps
        self.keys = Keys()
        self.vision = Vision(self)
        self.behavior = []
        self.play = None
        self.manual = False
```

The other important part is the customized **[main()](https://github.com/testflows/Examples/blob/v1.0/SuperMario/tests/actions/game.py#L135)** method that is converted to be a generator to control the game loop and
advance it step by step using the standard **[next](https://docs.python.org/3/library/functions.html#next)** function applied to the **[play](https://github.com/testflows/Examples/blob/v1.0/SuperMario/tests/actions/game.py#L109)** attribute that stores game loop generator object.
Therefore, **`next(game.play)`** will allow us move the game to the next frame.
It also calls the **[Vision](https://github.com/testflows/Examples/blob/v1.0/SuperMario/tests/actions/vision.py#L13)** class instance's **[detect()](https://github.com/testflows/Examples/blob/v1.0/SuperMario/tests/actions/vision.py#L208)** method to detect currently visible game objects. 

The customized **[main()](https://github.com/testflows/Examples/blob/v1.0/SuperMario/tests/actions/game.py#L135)** method also [appends](https://github.com/testflows/Examples/blob/v1.0/SuperMario/tests/actions/game.py#L144) the new **[BehaviorState](https://github.com/testflows/Examples/blob/v1.0/SuperMario/tests/actions/game.py#L82)** to the **[behavior](https://github.com/testflows/Examples/blob/v1.0/SuperMario/tests/actions/game.py#L108)** list to store previous and current frame states forming current game history. 

Here is the updated **[main()](https://github.com/testflows/Examples/blob/v1.0/SuperMario/tests/actions/game.py#L135)** method that contains the updated game loop which now contains a `yield` statement:

```python
    def main(self):
        """Main game loop."""
        def _main():
            while not self.done:
                self.event_loop()
                self.update()
                self.vision.detect()
                self.behavior.append(
                    BehaviorState(self.keys, self.vision.boxes, self.vision.viewport)
                )
                yield self
                pg.display.update()
                self.clock.tick(self.fps)
        self.play = _main()
```

The new **[Control](https://github.com/testflows/Examples/blob/v1.0/SuperMario/tests/actions/game.py#L101)** class allows us to implement the **[play()](https://github.com/testflows/Examples/blob/v1.0/SuperMario/tests/actions/game.py#L200)** action below where we can advance the game either by specifying time in seconds or the number of frames.

```python
def play(game, seconds=1, frames=None, model=None):
    """Play the game for the specified number seconds or frames."""
    if frames is None:
        frames = int(seconds * game.fps)

    for i in range(frames):
        next(game.play)
        if model:
            model.expect(game.behavior)
```

Note that the **[play()](https://github.com/testflows/Examples/blob/v1.0/SuperMario/tests/actions/game.py#L200)** action can take an optional **`model`** parameter which will allow us to pass a behavior model object,
which will provide the **expect()** method that will take the current game behavior and perform assertions about
the correctness of the current game state.

### Detecting game objects and drawing boxes around them

The ability to detect game objects and their positions is critical to game testing. To make games interesting they have quite a variety of them and *Super Mario* is no exception. We've already seen that in the new **[Control](https://github.com/testflows/Examples/blob/v1.0/SuperMario/tests/actions/game.py#L101)** class we've added **[vision](https://github.com/testflows/Examples/blob/v1.0/SuperMario/tests/actions/game.py#L107)** attribute set to an instance of the **[Vision](https://github.com/testflows/Examples/blob/v1.0/SuperMario/tests/actions/vision.py#L13)** class. The **[Vision](https://github.com/testflows/Examples/blob/v1.0/SuperMario/tests/actions/vision.py#L13)** class is exactly what implements object detection as well as the ability to draw on a screen that can be used in debugging our tests. 

Here is the **[\_\_init\_\_](https://github.com/testflows/Examples/blob/v1.0/SuperMario/tests/actions/vision.py#L29)** method of the class: 

```python
class Vision:
    """Game vision."""
    def __init__(self, game):
        self.game = game
        self.boxes = {}
        self.viewport = pg.Rect(0, 0, 0, 0)
```

It only has three attributes:

- **`game`** - a handle to the game's **`Control`** object (used for convenience)
- **`boxes`** - stores the detected game objects. It is called *boxes* because the bounds of each object in the game are defined by a rectangular box or specifically **[pygame.Rect](https://www.pygame.org/docs/ref/rect.html)** object which defines the position of the object in the game.
- **`viewport`** - stores an object that defines the chunk of the game level that can be currently seen on the screen

The actual method that is responsible for object detection is called the **[detect()](https://github.com/testflows/Examples/blob/v1.0/SuperMario/tests/actions/vision.py#L208)** which is defined as follows:

```python
   def detect(self):
        """Detect visible game elements."""
        self.boxes = self.get_visible()
        if self.boxes:
            self.viewport = self.game.state.viewport
        return self
```

It is very simple as the heavy lifting is done in the **[get_visible()](https://github.com/testflows/Examples/blob/v1.0/SuperMario/tests/actions/vision.py#L52)** method
which returns a list of visible elements in the current viewport. If any object
was detected then the **[viewport](https://github.com/testflows/Examples/blob/v1.0/SuperMario/tests/actions/vision.py#L32)** attribute is set to the current viewport.

In order to obtain the list of visible objects, the **[get_visible()](https://github.com/testflows/Examples/blob/v1.0/SuperMario/tests/actions/vision.py#L52)** method
introspects the **[self.game.state](https://github.com/testflows/Examples/blob/v1.0/SuperMario/source/tools.py#L45)** and pulls out any attribute
that is of **[pygame.sprite.Sprite](https://www.pygame.org/docs/ref/sprite.html#pygame.sprite.Sprite)** or **[pygame.sprite.Group](https://www.pygame.org/docs/ref/sprite.html#pygame.sprite.Group)** type. Where in PyGame, the **sprite.Sprite** is used for visible game objects and **sprite.Group** is used for holding and managing a group of Sprite objects.

The detected objects are saved in **[boxes](https://github.com/testflows/Examples/blob/v1.0/SuperMario/tests/actions/game.py#L85)** attribute of the **[BehaviorState](https://github.com/testflows/Examples/blob/v1.0/SuperMario/tests/actions/game.py#L82)** objects which are added to the **[game.behavior](https://github.com/testflows/Examples/blob/v1.0/SuperMario/tests/actions/game.py#L108)** attribute, where the **`game`** is an instance of the **[Control](https://github.com/testflows/Examples/blob/v1.0/SuperMario/tests/actions/game.py#L101)** class,  which holds a list of them.

All this machinery is used to implement the **[get_elements](https://github.com/testflows/Examples/blob/v1.0/SuperMario/tests/actions/game.py#L211)** and **[get_element](https://github.com/testflows/Examples/blob/v1.0/SuperMario/tests/actions/game.py#L216)** actions. 

```python
def get_elements(game, name, frame=-1):
    """Get elements by name in the specified frame, default: -1 (current frame)."""
    return game.behavior[frame].boxes[name]
```

```python
def get_element(game, name, frame=-1):
    """Get element by name in the specified frame, default: -1 (current frame)."""
    return get_elements(game, name, frame)[0]
```

For easier visual debugging, the **[Vision](https://github.com/testflows/Examples/blob/v1.0/SuperMario/tests/actions/vision.py#L13)** class also provides the **[overlay()](https://github.com/testflows/Examples/blob/v1.0/SuperMario/tests/actions/vision.py#L34)** method that can be used to draw boxes around elements. For example,
we can draw a colored box around Mario to visually mark its detected position in the test. The **[overlay()](https://github.com/testflows/Examples/blob/v1.0/SuperMario/tests/actions/game.py#L221)** action then just provides a convenient wrapper around calling this method.

```python
def overlay(game, elements, color=Vision.color["red"]):
    """Overlay boxes around elements on the screen."""
    game.vision.overlay(boxes=[element.box for element in elements], color=color)
```


### Simulating keypresses

The last set of actions are for controlling keypresses supported by the game.
A single key press consists of posting `KEYDOWN` and `KEYUP` events.
We also need the ability to keep the key down for some period of time and
therefore the low-level **[simulate_keypress](https://github.com/testflows/Examples/blob/v1.0/SuperMario/tests/actions/game.py#L161)** action is implemented as a context manager. 

```python
@contextmanager
def simulate_keypress(key):
    """Simulate a key press and release event for the given key."""
    pg.event.post(pg.event.Event(pg.KEYDOWN, key=key))
    yield
    pg.event.post(pg.event.Event(pg.KEYUP, key=key))
```

Using the **[simulate_keypress](https://github.com/testflows/Examples/blob/v1.0/SuperMario/tests/actions/game.py#L161)** low-level action we can implement all necessary player actions such as pressing:

- **Enter** key (activate selection like when selecting a player type)

  ```python
  def press_enter():
     """Press the enter key."""
     return simulate_keypress(key=keys["enter"])
  ```

- **`→` (right)** key (move right)

  ```python
  def press_right():
      """Press the right arrow key."""
      return simulate_keypress(key=keys["right"])
  ```

- **`←` (left)** key (move left)

  ```python
  def press_left():
      """Press the left arrow key."""
      return simulate_keypress(key=keys["left"])
  ```

- **`↓` (down)** key (move down like when entering a pipe)

  ```python
  def press_down():
      """Press the down arrow key."""
      return simulate_keypress(key=keys["down"])
  ```

- **`a` (up)** key (short or, if pressed continuously, long jump)

  ```python
  def press_jump():
      """Press the jump key."""
      return simulate_keypress(key=keys["jump"])
  ```

- **`s` (action)** key (perform an action like running or throwing a fireball)

  ```python
  def press_action():
      """Press the action key."""
      return simulate_keypress(key=keys["action"])
  ```


## Checking basic movements using classical auto tests

With all these test actions in hand we are ready to start testing.
First, we can write a few simple classic tests and then off we go to developing
a **behavior model** that we can use with manual, semi-automated, or any sort of automated or autonomous testing we want.

### Moving right test

Alright, let’s kick things off with a simple but essential test: checking if Mario — called the **`player`** element in the game — actually moves **right** when we press the right key.

Here is our simple plan for the test:

1. **Get Mario’s starting position** – Where is he standing before we do anything?
2. **Press the right key** – Hold it for **one second**.
3. **Check where Mario ended up** – Where is Mario standing now?
4. **Verify the result** – If his **x-coordinate increased**, he did move right 🎉!

Here is the **[move right](https://github.com/testflows/Examples/blob/v1.0/SuperMario/tests/move_right.py)** test that uses our test actions:

```python
@TestScenario
def scenario(self):
    """Check Mario can move right in the game."""
    game = self.context.game

    with Given("Mario's start position"):
        mario_start = actions.get_element(game, "player")

    with When("press the right key for 1 second"):
        with actions.press_right():
            actions.play(game, seconds=1)

    with And("get Mario's end position"):
        mario_end = actions.get_element(game, "player")

    with Then("check Mario moves right"):
        assert mario_end.box.x > mario_start.box.x, error()
```

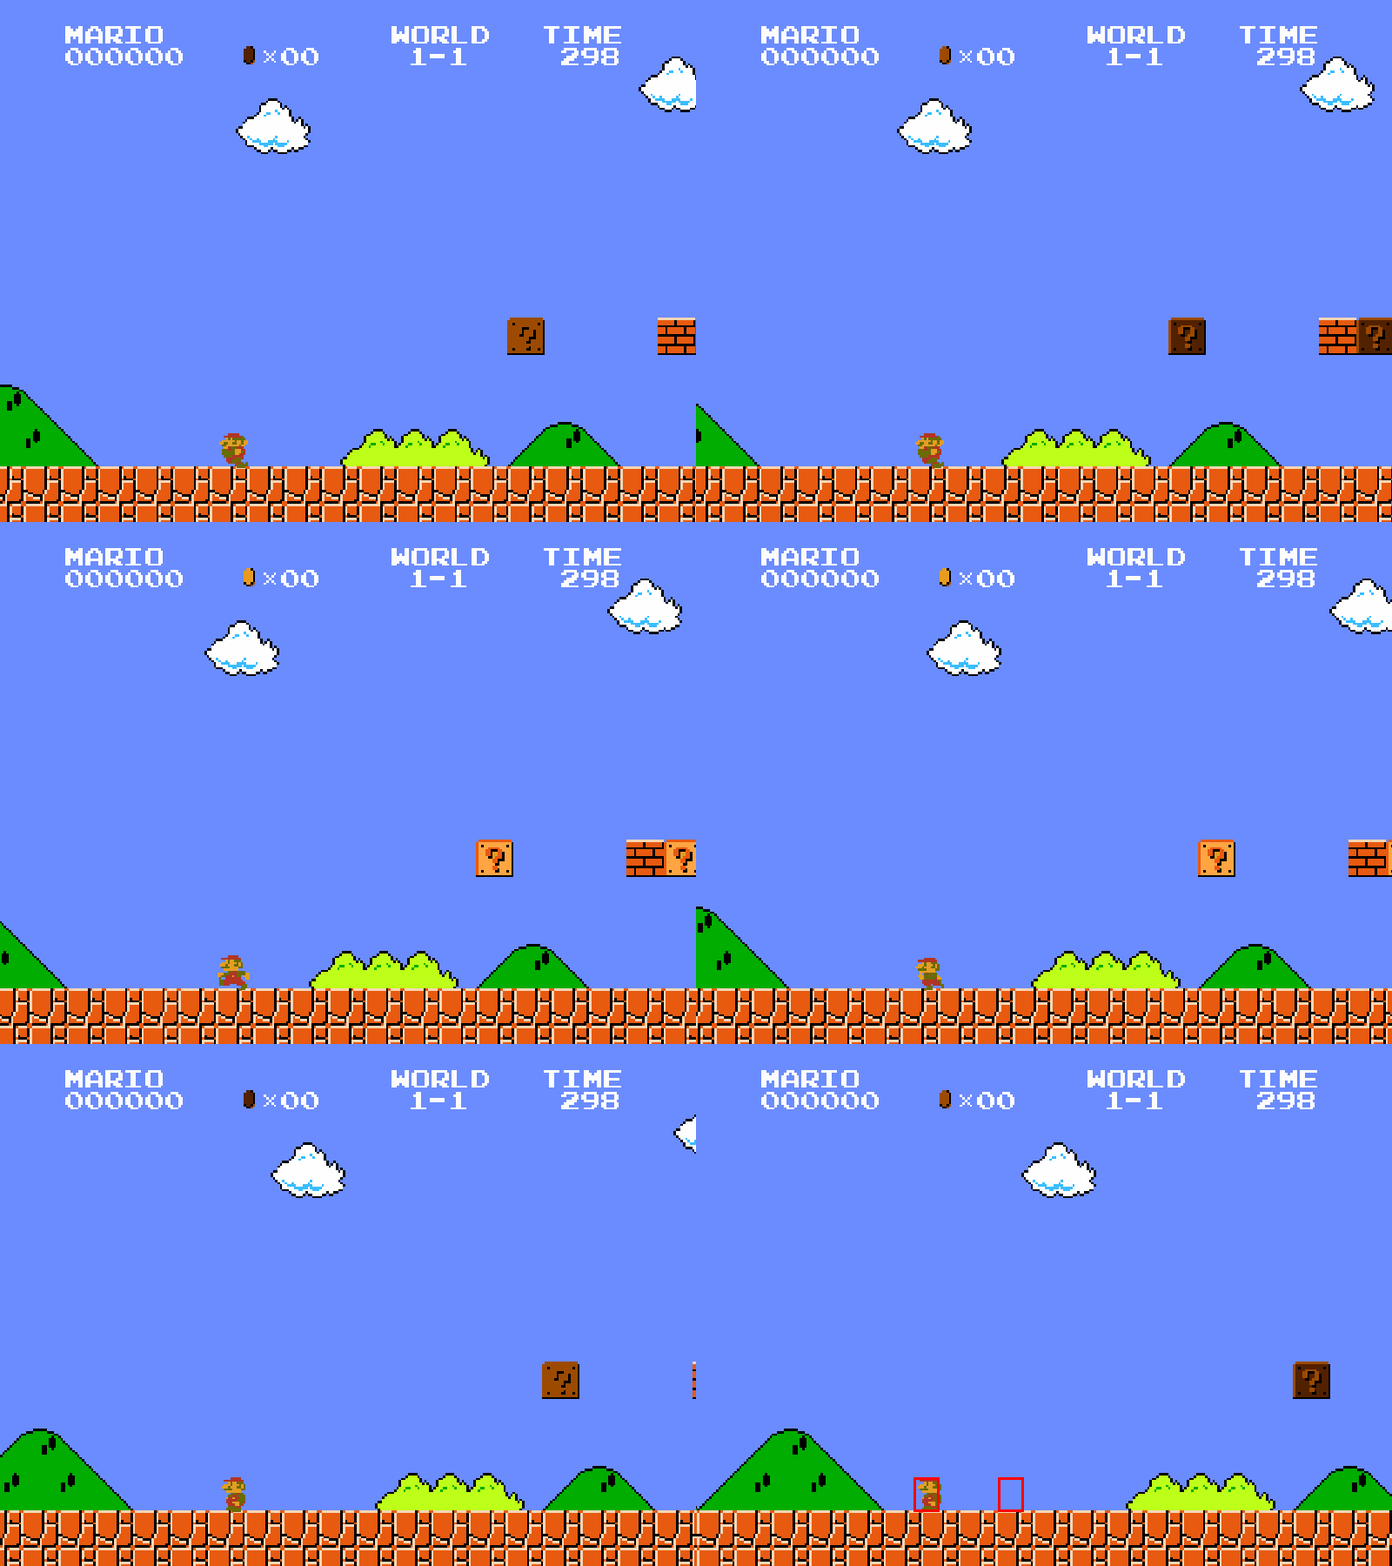
If Mario **doesn’t move**, we’ll know something’s off. But if everything works, our test passes. Here's a video of this test in action with the red boxes added to Mario's start and end positions for visual confirmation.

<div class="text-center">
<img alt="Animation of Mario moving right in the classic Move Right test, with boxes marking the start and end positions" style="width: 75%" src="/images/testing-super-mario-using-a-behavior-model-pic-5.gif">
<div class="text-secondary text-bold"><br>Super Mario: Move Right Classic Test</div>
</div><br>

Try it out for yourself inside the `Examples/SuperMario` directory by running the following command which includes the `--save-video` option to record the video of that full test:

```bash
./tests/run.py --save-video --only "/super mario/classic/move right/*"
```

The video will be saved in the `move_right.gif` file inside your current working directory.

### Moving left test

Similarly, we can easily implement a test to check if Mario moves **left** when
we press the left key. 

As expected, the **[move left](https://github.com/testflows/Examples/blob/v1.0/SuperMario/tests/move_left.py)** test is similar to the **[move right](https://github.com/testflows/Examples/blob/v1.0/SuperMario/tests/move_right.py)** test as shown below.

```python
@TestScenario
def scenario(self):
    """Check Mario can move left in the game."""
    game = self.context.game

    with Given("Mario's start position"):
        mario_start = actions.get_element(game, "player")

    with When("press the left key for 1 second"):
        with actions.press_left():
            actions.play(game, seconds=1)

    with And("get Mario's end position"):
        mario_end = actions.get_element(game, "player")

    with Then("check Mario moves left"):
        assert mario_end.box.x < mario_start.box.x, error()
```

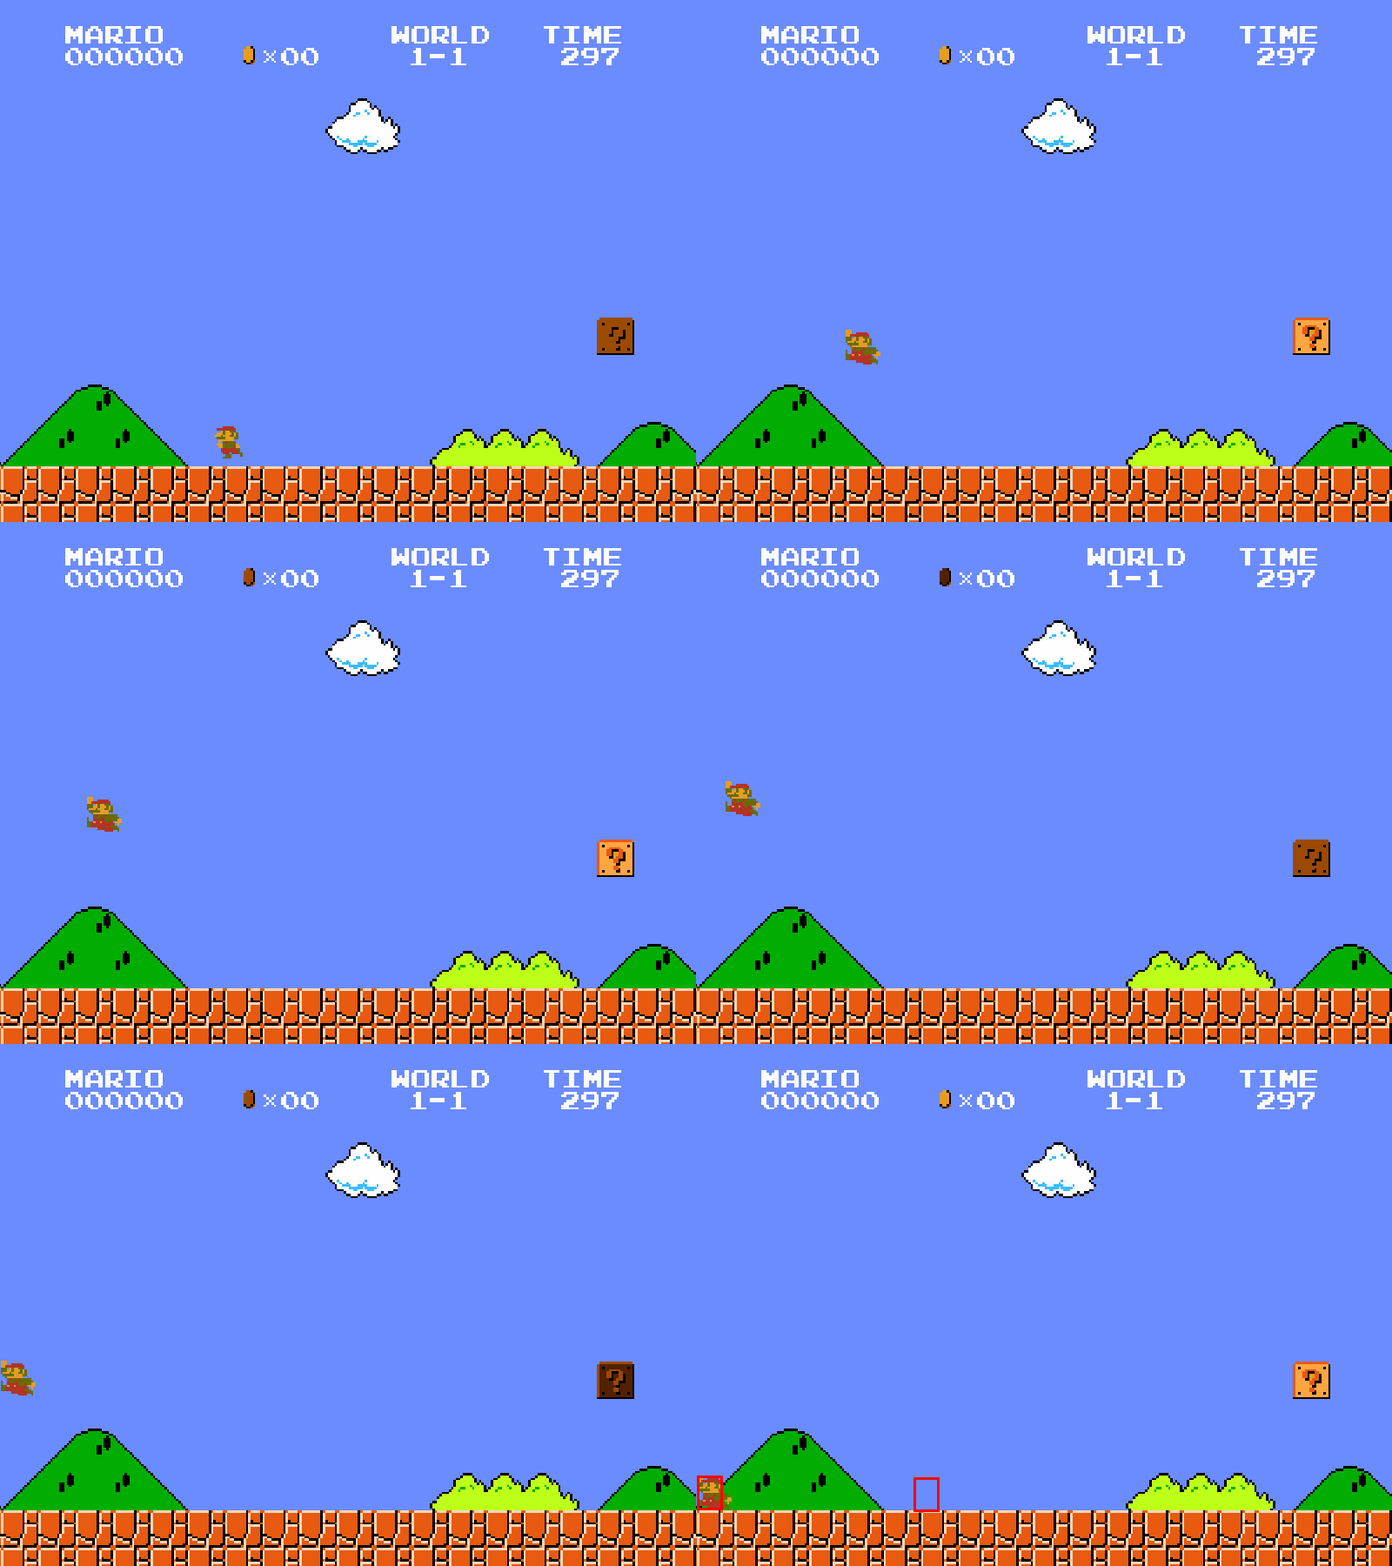
Here is a video of the test:

<div class="text-center">
<img alt="Animation of Mario moving left in the classic Move Left test" style="width: 75%" src="/images/testing-super-mario-using-a-behavior-model-pic-6.gif">
<div class="text-secondary text-bold"><br>Super Mario: Move Left Classic Test</div>
</div><br>

However, note that because we share the game between two tests we see that while
the **move left** test is working and passing, Mario does not move to the left the same
distance as he did in our **move right** test. Why? Well, because the game is not
in the starting state and Mario has some velocity given by the **move right** test before we press the left key in our **move left** test! So, this is interesting and shows that by using the optimization of sharing the same instance of the game between tests, our tests have different initial states. Therefore, our **move left** test is actually a **move left after moving right** test. The only reason why our
assertion is passing is that it tests for a very broad proposition of the **x-coordinate** being larger or smaller based on the direction of the movement.

Try it out and watch the `move_left.gif` video when you run the **move left** test by itself:

```bash
./tests/run.py --save-video --only "/super mario/classic/move left/*"
```

Compare this to when you run **move right** and **move left** tests together, where the **move right** test will be executed first:

```bash
./tests/run.py --save-video --only "/super mario/classic/move right/*" "/super mario/classic/move left/*"
```

> We will not address this issue here, but note that in general, the same actions will not result in the same end states if the initial state is different.

This is what makes testing stateful systems like games a lot of fun! The challenge is that to
properly test the **move left** action inside the game, you need to try to move left in every possible game state,
observe the result and check if it is correct. This is not possible with simple targeted classic tests.
Actually, complete test coverage is impossible due to **every possible game state** being practically untraceable.
However, autonomous testing that uses a behavior model can cover orders of magnitude more **move left** actions across random game states than would otherwise be possible. Every time the action is attempted, the behavior model can run assertions about the correctness of the behavior at that particular state.


### Jumping test

By now you get the idea of how classical tests can be written. But for fun, I can't resist, so let's quickly look at the **[jump](https://github.com/testflows/Examples/blob/v1.0/SuperMario/tests/move_jump.py)** test. We'd love to see Mario jump!

Here is the test when we press the jump key for `1` second and then assert
that the end **y-coordinate** is smaller that the start **y-coordinate**.
Why? Because screen's **y-coordinates** start at `0` on the top and increase going down. 

```python
@TestScenario
def scenario(self):
    """Check Mario can jump in the game."""
    game = self.context.game

    with Given("Mario's start position"):
        mario_start = actions.get_element(game, "player")

    with When("press the jump key for 1 seconds"):
        with actions.press_jump():
            actions.play(game, seconds=1)

    with And("get Mario's end position"):
        mario_end = actions.get_element(game, "player")

    with Then("check Mario moves up"):
        assert mario_end.box.y < mario_start.box.y, error()
```

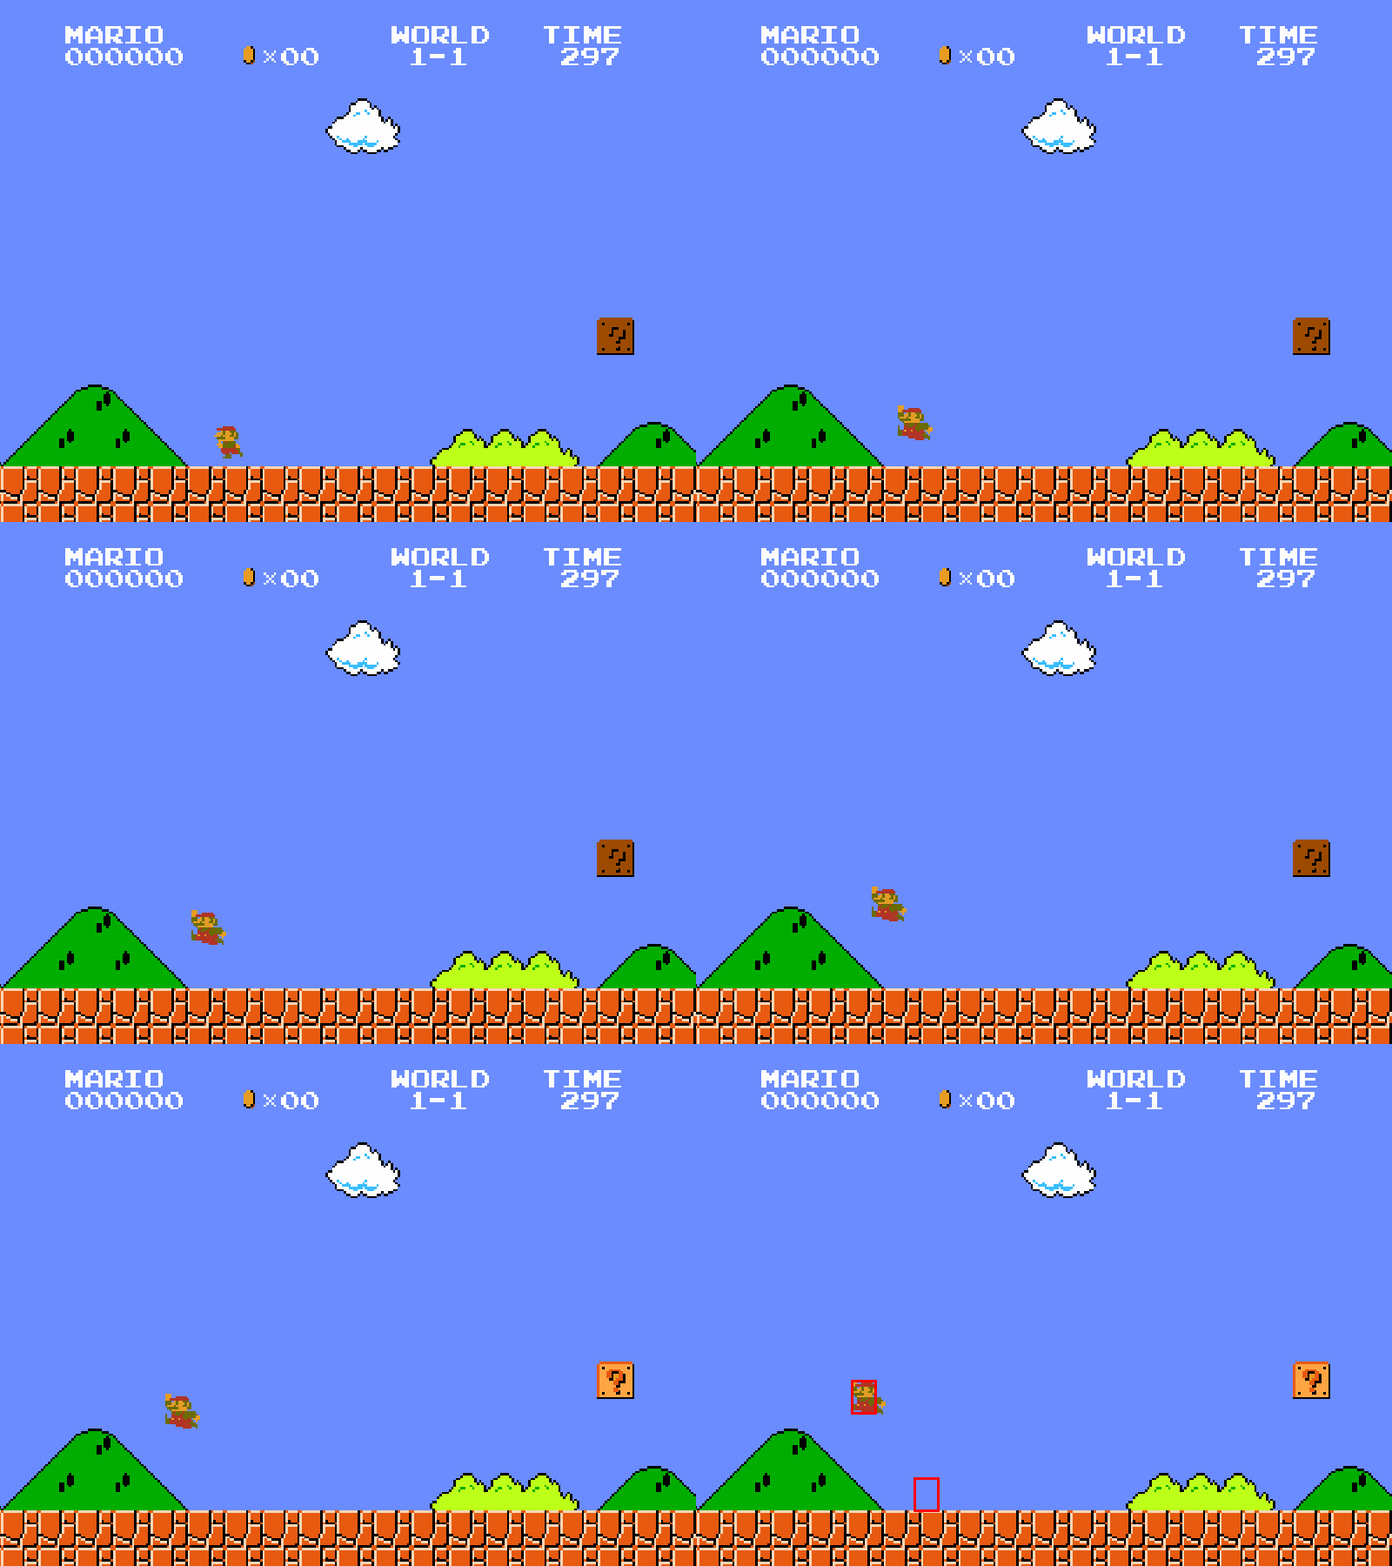
Here is the video of the test:

<div class="text-center">
<img alt="Animation of Mario jumping for one second in the classic Jump test" style="width: 75%" src="/images/testing-super-mario-using-a-behavior-model-pic-7.gif">
<div class="text-secondary text-bold"><br>Super Mario: Jump For 1 Second Classic Test</div>
</div><br>

Wait, but the Mario's end position looks like is a ground level because he
hits the left level boundary because he had an initial left velocity (because of the previous **move left** test) and moreover the jump movement does not mean that
Mario will stay up in the air if we press the jump key for some time.
Press it long enough and Mario will be pulled by the game's physics (the gravity)
back down! So why does the test pass? It just happens that the end position
is 2 y-pixels off from the starting position. This means that testing the jump move is tricky! The behavior is actually more complex. Also, note that Mario is jumping to the left because of the velocity in the left direction given by the previous **move left**
test. This means that there is `x` and `y` velocity that needs to be considered, and the gravity pull causes Mario's position in the air to change. This behavior is more complex that one would initially would think.

Having identified these issues, but still wanting to keep our assertion simple,
we modify test's action to hold the jump key for `0.2` seconds instead of `1`.

```python
        with When("press the jump key for 0.2 seconds"):
            with actions.press_jump():
                actions.play(game, seconds=0.2)
```

Here is what we have now:

<div class="text-center">
<img alt="Animation of Mario jumping for 0.2 seconds in the classic Jump test" style="width: 75%" src="/images/testing-super-mario-using-a-behavior-model-pic-8.gif">
<div class="text-secondary text-bold"><br>Super Mario: Jump For 0.2 Seconds Classic Test</div>
</div><br>

Our simple assertion will now pass with confidence! However, checking the complexity of
the full jumping move is non-trivial. Actually, if we think about the **move right** and **move left** tests they also did not account for initial position and velocity as well as any obstacles we could have run into or complex physics interactions!

Try it out and watch the `move_jump.gif` video to see a different behavior when you run the **jump** test by itself:

```bash
./tests/run.py --save-video --only "/super mario/classic/move jump/*"
```

When the **jump** test is executed by itself, Mario will not have any velocity in the x or y direction, so you should
see Mario going straight up.

This is what makes game testing so hard. The behavior is very complex. Nonetheless, we've shown that we could make simple assertions work, and they are useful but are not precise enough to capture the game's physics of the movements.

## Wrapping up

In this first part, we've explored the architecture of our reference implementation of *Super Mario* and built a comprehensive testing framework. We discovered that what developers call "states" are actually **clusters of states**, where the real game states are defined by attribute values, creating practically infinite possible system states.

We implemented:
- Custom game controls for frame-by-frame advancement
- Vision system for object detection and tracking  
- Test actions for simulating keypresses
- Classic tests that revealed a key insight: **the same action produces different results depending on the initial state**

While our classic tests can verify basic functionality, they struggle with the combinatorial explosion of possible states. This is exactly where behavior models excel—they can cover orders of magnitude more state combinations while running meaningful assertions about correctness at every tested state.

In Part 2, we'll cover the theory behind behavior models and build one from scratch.

{% html div class="classic-quote" %}

> 🛸 Continue to **[Testing Super Mario Using a Behavior Model (Part 2)](/blog/testing-super-mario-using-a-behavior-model-part2.md)**

{% endhtml %}